What the 3MF keeps, and what it loses
A STEP file describes each part exactly, as faces of a solid: a hole is a true cylinder. A 3MF describes it as triangles, which is what a slicer works from. The converter cuts every curved face into triangles at the quality you choose and writes each part as an object of the 3MF, with its name.
| In the 3MF | |
|---|---|
| Shape | Triangles, as fine as the mesh quality. Flat faces are exact |
| Size | Millimeters, stated in the file, the real size whatever unit the STEP was drawn in |
| Parts | An object for each part, named after it |
| Solids | Closed meshes, their triangles joined at the edges |
| Colors | Each part's color, written the 3MF specification's way |
| Assembly structure | Flattened: every part on its own, a part used twice written twice |
| Exact geometry | Lost. The 3MF cannot be edited as a solid in CAD; keep the STEP file |
How to convert a STEP file to 3MF
- Drop the STEP or STP file on this page, or choose it with the button. It is read in your browser; nothing is uploaded.
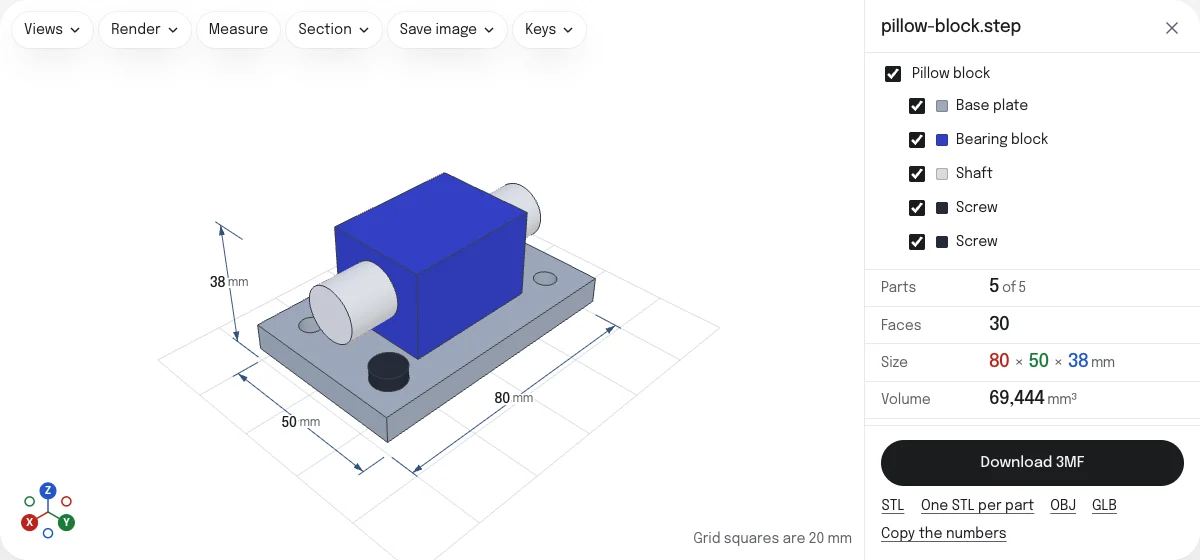
- Look at the model, its parts and its size. A STEP file states its units, so the size shown is the real one, in millimeters.
- Choose the mesh quality. Normal suits most printed parts.
- Untick any parts you do not want to print.
- Choose Download 3MF. The file is named after the STEP file.
A part or a small assembly is ready in a second or two. A very large assembly takes longer to read, with a line saying what is being done and Cancel beside it.
In the slicer
The 3MF is written to the core 3MF specification, which every current slicer reads. The parts come in as separate objects with the names they had in CAD, so a list of twelve parts reads as twelve names and not as “Object 1” to “Object 12”.
Where they land depends on the slicer. Opened from their command lines, Bambu Studio 2.8 lays the parts of the sample assembly out apart on its plate, each on the first filament, and PrusaSlicer 2.9 sets each part down on the bed where it stood in the assembly, the block over the plate, until you choose Arrange. Both keep the five names.
The unit is part of the file. A part drawn in inches comes in at its real size, converted to millimeters on the way, and nothing has to be scaled by 25.4 in the slicer.
Each part is welded: where two faces of a part meet, their triangles share their corners. That is what a slicer checks when it looks for holes, and a solid from the STEP file passes it.
3MF or STL
Both are for printing, and the mesh in both is the same. The 3MF holds the unit, the names and every part in one file. The STL holds one mesh with none of those, and is what older slicers and printing services ask for. The STEP to STL converter is the page for it, with one STL for each part in a ZIP if you print them apart.
Mesh quality
Curved faces have to be cut into triangles, and the quality decides how finely: Coarse, Normal and Fine go by the size of the model, and Custom takes a tolerance in millimeters and an angle of your own. Flat faces are exact at every setting. At Normal a Ø20 mm hole stands off its true circle by about 0.03 mm, far below what a 0.4 mm nozzle can show, so Normal is fine enough for most parts. The STEP to STL converter explains the four settings in numbers; they work the same here.
To find out what a print of the 3MF will cost in filament and time, slice it, then drop the G-code on the 3D print cost calculator.
Questions
Is my file uploaded?
No. The STEP file is read and the 3MF is written by your own browser. Nothing is sent to a server.
Why 3MF and not STL?
A 3MF states its unit, keeps each part as an object with its name, and holds every part in one file. An STL has no unit, no names and one mesh, so an assembly arrives in the slicer as one lump, or as a ZIP of files. Every current slicer opens 3MF: Bambu Studio, OrcaSlicer, PrusaSlicer and Cura.
Are the parts ready to print?
Each part that is a solid in the STEP file becomes a closed mesh, with its triangles joined at their edges, so the slicer finds no holes in it. A file that holds loose surfaces instead of solids gives open meshes; the STEP viewer on this site says which a file holds.
Are colors kept?
Each part's color is written into the 3MF, the way the 3MF specification describes colors. Bambu Studio and PrusaSlicer read the parts and their names but not those colors: Bambu Studio puts every part on the first filament, and you choose a filament for each part in the slicer, as you would for any model.
Can I print the parts separately?
Yes. Each part is an object of its own, so the slicer can lay them out, turn them and print them one by one. Opened from their command lines, Bambu Studio laid the sample's parts out apart on its plate, and PrusaSlicer set each one down on the bed where it stood in the assembly, so that they overlap until you choose Arrange. Hide parts in the list before you download to leave them out of the file.
Which mesh quality should I choose?
Normal is right for most printed parts. Choose Fine when a round face has to fit something, such as a bore or a shaft. There is no reason to go finer than your printer can show: the triangle count is shown before you download.